
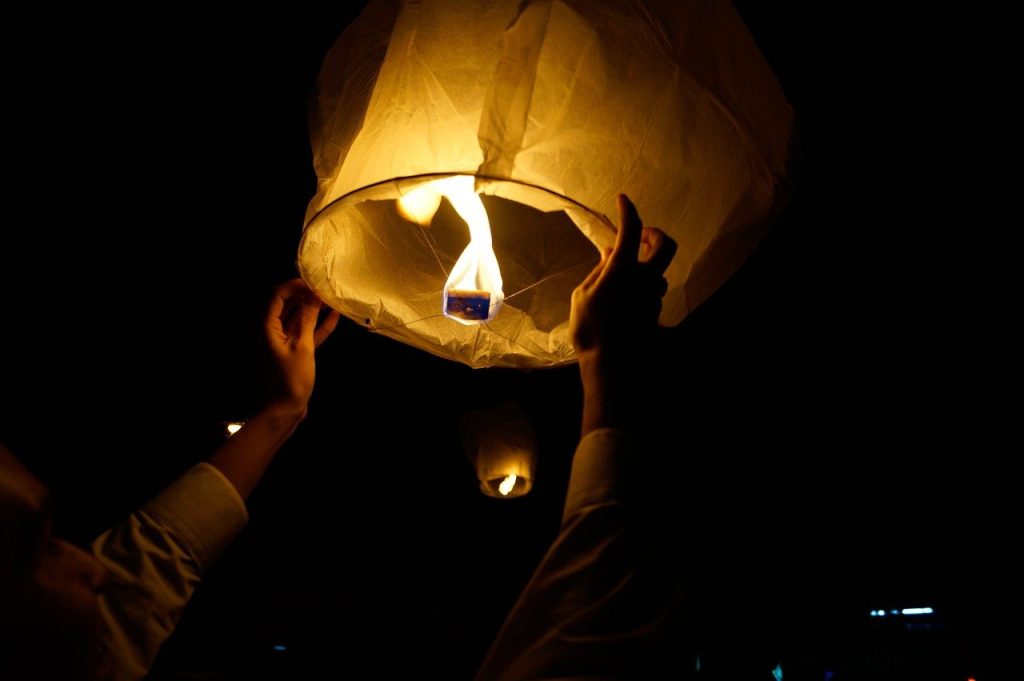
Cantoya balloons have a special symbolism for people and are generally released with wishes or messages to the sky. It is believed that their origin comes from Asian culture, although in Mexico they are called cantoya balloons in honor of Joaquín de la Cantolla y Rico, a pioneer builder of hot air balloons.
Its operation is very basic; in fact, it's due to the change in air density. But if you're looking for a fun and easy way to make them at home, you've come to the right place . In this article, I'll teach you all the steps you need to follow to make a sky lantern. So let's not wait any longer and get started!
How to Make a Cantoya Balloon?
What is Needed to Make a Cantoya Balloon?
- The main requirement to make a cantoya balloon is the china paper, you will need 5 to 8 sheets of this depending on the shape you want to give the cantoya balloon
- The wire is important, it will help us to give structure to the balloon, galvanized wire No. 20 is usually used
- The wick can be made with napkins, cotton and even non-synthetic fabrics
- To get the wax that will be the balloon fuel, you can melt candles
- The glue either in stick or white will help you to join the balloon and that there is no leak or entry of air
- Having a cutter or scissors at hand will be essential to make this balloon
Steps to follow to Make a Balloon of Cantoya;
Sky lanterns are widely used for New Year's festivities ; it's a beautiful way to start the year by closing the cycle of the previous one, and what better way to do it than by making it with our own hands? Therefore, in this section, I will leave you all the steps you need to follow to make a sky lantern.
Step 1.- Take the measure of the Chinese paper
Sheets of tissue paper are usually rectangular, so take the width measurement and transfer it to the length of the paper, for example, if it is 66 cm wide, it will also be 66 cm long.
Step 2.- Cut the sheets and mark where they will be joined
Draw with a ruler and cut the 5 sheets to the same size, then take 4 of the sheets and mark 2 cm on each of their edges as this will be the space where they will be glued.
Step 3.- Paste the paper by its ends
Glue each of its ends very well and the fifth sheet will be the roof of the balloon ; this step is very important because if it is not glued well, air can get in and it will not rise.
Step 4.- Make a circle of wire for the base
Now you must make the base of the balloon . To do this, take a piece of wire and make a circle that has a diameter 5 cm smaller than the walls of the balloon. For example, if the walls are 66 x 66 cm, the circle should be 61 cm. Use tape to secure the ends.
Step 5.- Make the cross that will hold the wick of the balloon
Take two pieces of wire and form a cross with them, then join them to the circle you made earlier and with another piece of wire make a U- shaped hook fixing it in the center of the circle you made, attach it to the cross.
Step 6.- Make the wick of the balloon
Take 4 napkins and spread them out on the work table you are using. In a pot, melt a candle to obtain the wax, pour it over each of the napkins , and wait for them to cool by storing them in the refrigerator.
Step 7.- Wrap the wick of the balloon in the base
After they cool, take one of these napkins and wrap it around the "U" hook ; now join this whole structure and fix it to the balloon.
Step 8.- Write your wish and tie it to the balloon
Finally, write a New Year's wish and tie it to the balloon ; to make it fly you must light the wick you made and then release it (this part is recommended to be done with someone else).
How to Make an 8 Sheet Cantoya Balloon?
There are several ways to make a Cantoya balloon, and one of them is by making it from 8 sheets. If you want to put this technique into practice, just follow all the steps that we will teach you below.
Materials to use;
- 8 sheets of Chinese paper in two different colors
- Scissors and cutter
- Liquid white glue
- Ruler and pencil
- thin wire
- Napkins
- Sails
- Tweezers
Step 1.- Cut the tissue paper in half
Take the 8 sheets of tissue paper and cut them in half ; you will get 16 sheets in total, 8 of each color.
Step 2.- Cut the sheets diagonally
Then take 4 sheets of each color and cut them diagonally from corner to corner ; in the end you will get 16 triangles.
Step 3.- Make rectangles with the triangular papers
Now make a large rectangle with two of the sheets you cut earlier , and glue them one on top of the other by a 1 cm border.
Step 4.- Make larger rectangles from the small ones
Do the same with the rectangles, form a larger one from two, glue them together at the 90 ° angle and repeat this process 7 more times, to obtain 8 triangles of two colors.
Step 5.- Join the triangles and rectangles of paper
Now join the triangles and rectangles as follows: place the rectangle vertically, then join the triangles to its sides at the 90 ° angle , and play with the colors so that they are opposite each other in position.
Step 6.- Place the pieces one on top of the other to glue them
Repeat this process until you have 4 identical pieces and now it's time to join them all together . To do this, place one piece on top of the other, the bottom one should have its edge slightly offset to make a hem of approximately 1 cm.
Step 7.- Add glue to the edge and join the pieces
Place glue along this fold and glue the other piece on top, then fold this same piece in half and repeat step 6.
Step 8.- Close the balloon by gluing the last edge
To close the balloon, unfold the top pieces, hem one of them, then join them by applying glue , check that everything is very well glued and cut 15 cm from one of its points to make the opening of the balloon.
Step 9.- Cut the napkin to make the wick
To make the balloon wick, first cut a large kitchen napkin into 4 equal parts.
Step 10.- Submerge the napkins in the liquid wax
Melt a candle so that the wax becomes liquid and with the tongs hold the napkin to submerge it in the liquid wax ; then let them cool until the wax is cold and solid.
Step 11.- Make the base of the balloon
Measure the size of the opening or base of the balloon, in this case it should be a square of approximately 24 cm and make a square with wire of this same dimension , use packing tape to fix its ends.
Step 12.- Place the base on the edge of the balloon and fix it
Insert the square inside the balloon and hold it with a hem facing inwards that will cover it and secure it with glue.
Step 13.- Make a base for the balloon wick
Cut two 35cm pieces of wire and fold them in half, then pierce the two wicks through the center and then further down with one of the wires and insert the second one through the same holes.
Step 14.- Bring the wick to the center and turn the base into a kind of spider
Run the wicks to the center of the wires and secure them by wrapping the wires with the pliers ; then separate the ends of the wire, one in each direction, obtaining a cross-shaped spider with the wick in the middle.
Step 15.- Wind this spider with wick to the base of the balloon
Wrap it around the base of the balloon, piercing one of its edges in the middle, and make sure all the points are aligned so that it can maintain its balance, and that's it! You can now release your Cantoya balloon on New Year's Day.
How to Make a Small Cantoya Balloon?
The best thing about sky lanterns is that you can make them in different sizes; there's something for everyone. Therefore, in this section you will find all the steps to make a small sky lantern with simple and practical materials.
Materials to use;
- 5 sheets of Chinese paper in different colors
- liquid white glue
- Galvanized wire Nº20
- Cutting pliers
- 4 napkins
- Tape
- Ruler and pencil
- Scissors
- girl candle
Step 1.- Cut the paper for the cantoya balloon
Use the ruler and pencil to draw a 30×30 cm square on one of the sheets of tissue paper, then place the rest underneath and cut them all following the drawn line.
Step 2.- Mark the gluing edges on the paper
Take 4 of the sheets and mark 2 cm on each of their edges as this will be the space where they will be glued.
Step 3.- Glue all the ends very well
Glue each of its ends very well and then the fifth sheet is the roof of the balloon; this step is very important because if it is not glued well, air can enter the balloon and it will not rise.
Step 4.- Make a base circle for the balloon
Take a piece of wire and make a circle that has a smaller diameter than the walls of the balloon ; if they are 30×30 cm, the circle should measure approximately 25 cm; use tape to secure the ends.
Step 5.- Create a base for the wick and attach it to the base of the balloon
Form a cross with two pieces of wire, then join them to the circle you made previously and make a U-shaped hook by fixing it in the center of the circle you made.
Step 6.- Make the wick for the cantoya balloon
Take 4 napkins and spread them out on the work table you are using. In a pot, melt a candle to obtain the wax and pour it over each one of them. Wait for them to cool by storing them in the refrigerator.
Step 7.- Wrap the wick in the base hook
After they cool, take one of these napkins, wrap it around the "U" hook, now join this whole structure and fix it to the balloon.
Step 8.- Release the balloon
To make it fly, you must light the wick you made and then release it. Before releasing it, tie to the base the wish you want to fulfill or something you want to let go of . Cantoya balloons are used to take away and burn what weighs us down on paper or to attract what we long for with our hearts.
How to Make a Cantoya Balloon in the Shape of a Cube?
It is also possible to make a cube-shaped cantoya balloon, if you want to learn how to do it in this section I will teach you everything you need to know.
Materials to use;
- 4 sheets of tissue paper of the same or different colors
- Liquid glue
- Galvanized wire Nº20
- Cutting pliers
- 12 napkins
- Two candles
Step 1.- Join two Chinese papers by the width
Take two sheets of tissue paper and join them very well along the wide side, that is, the side that measures fewer centimeters . You must keep in mind that there cannot be any holes that allow air to enter.
Step 2.- Fold two more papers and place the first ones on top
Fold the two remaining sheets in half along the longer side and place the ones you joined earlier horizontally on the table or surface you are working on.
Step 3.- Put a sheet of Chinese paper under the previous one
Now, place and glue another sheet underneath this one , making sure that the joining lines of the first sheets coincide with the fold line of the one you are placing below.
Step 4.- Repeat the previous step
Repeat the procedure with the last sheet, but place it on the other side; in the end you will have a cross formed by the four sheets of tissue paper.
Step 5.- Join all the sides of the paper to assemble the cube
Glue each side of the paper together to create a completely closed cube shape. To do this, make a 1 cm tab on one side, then apply a line of glue to this tab and join the other side.
Step 6.- Cut one of the corners to place the base of the balloon
Wait for them to dry and then cut one of their corners about 10 cm away and measure the size of this opening to make the base square.
Step 7.- Prepare the wick for the cantoya balloon
It's time to make the wick. Melt the candles so the wax becomes liquid, then roll the 12 napkins together and dip them in the wax so they soak it up well, then let them dry.
Step 8.- Assemble the base of the balloon and place the wick
Using galvanized wire, make the base of the balloon; it should be square and the same size as the opening you made . Then, pierce the square with two more pieces of wire, making a cross, and fix the wick to it.
Step 9.- Fix the base to the ridge balloon
Attach this base to the balloon by inserting it through the opening. To secure it, fold the edges of the balloon over the wire with glue. In this way, your cube-shaped sky lantern will be ready to use.
How to Make a Cantoya Balloon in the Shape of a Rhombus?
One of the most original shapes of sky lanterns are those shaped like a diamond; making them is not complicated and you will need few materials, so in this section we will tell you everything you need to make them.
Materials to use;
- 8 sheets of Chinese paper in two different colors
- Scissors and cutter
- Glue stick
- Sails
- Cotton
- Wire
- Tubo
Step 1.- Cut the sheets of Chinese paper diagonally
Start by cutting the tissue paper diagonally , so that for each sheet you get two triangles; in the end you should have 16.
Step 2.- Paste the triangles at the 90º angle
Take one triangle of each color and join them along the side with the 90° angle. Repeat this process until you have joined them all and have 8 larger triangles.
Step 3.- Fix a pair of triangles at the base
Next, join a pair of triangles at their base and make sure the paper colors contrast. Remember to glue the edges very well, as there cannot be any gaps where air can get in.
Step 4.- Start by gluing the first two rhombuses to close the balloon
Step #3 should result in 4 rhombuses, now you must glue them together . To do this, make a 1 cm hem or edge on one side of the rhombus, then glue the second one underneath it.
Step 5.- Glue the rhombus 2 to the third from the other end
Fold up the side of the rhombus that is not glued, now glue the third rhombus and you are going to make the 2 cm border in the middle of the 2nd rhombus that is folded up; glue the 3rd one below this one.
Step 6.- Repeat the two previous steps until finished
Now repeat the process until the balloon is closed . To do this, keep in mind that the selvedge will go on the folded side of the 4th rhombus, and you must glue the free side of the first rhombus to the last one.
Step 7.- Make the wick for the cantoya balloon
It's time to make the balloon wick . Melt the candles and then, when the wax is liquid, dip a thick strip of cotton into it.
Step 8.- Roll up the wick and wait for it to dry
Wait until it is thoroughly soaked, then use the tube to remove it and roll it up , obtaining a cotton roll. Wait for it to dry or put it in the refrigerator.
Step 9.- Shape the base structure of the balloon
To make the base of the balloon, you must make a small circle of wire, then create a kind of pyramid on top of it using two more pieces that cross and form this conical structure.
Step 10.- Calculate the size of the base and take it to the balloon
Now you must calculate the size of the base on the balloon ; to do this, place it on top of one of its corners, and where it covers the space will be the correct place.
Step 11.- Cut the opening in the balloon to put the base
Then cut about 3 cm above the calculated measurement and cut the corner of the balloon (we recommend you choose the least pretty one), make small cuts around these will become tabs.
Step 12.- Fit the wick at the base of the balloon and voila!
Take the wick out of the refrigerator and fit it into the wire base you made , then insert this base into the balloon and glue it, wrapping the tabs of the edge around the wire and that's it! Your sky lantern will be finished.
What is the price of a Cantoya Balloon?
If you wish to purchase them rather than make them yourself, you should know that Cantoya balloons are quite affordable . Therefore, if you don't want to invest in the materials to make them, keep in mind that depending on their size, quantity, and shape, they range in price from 7,3 euros to 23 euros.
We've reached the end, but not before thanking you for reading this far. We hope these ideas help you make a Cantoya balloon with your own hands and send a special message into the sky. Finally, we want to remind you that you can continue enjoying all the content we have for you by visiting our website in future posts. We look forward to seeing you there!
Table of Contents
- 1 How to Make a Cantoya Balloon?
- 1.1 What is Needed to Make a Cantoya Balloon?
- 1.2 Steps to follow to Make a Balloon of Cantoya;
- 1.2.1 Step 1.- Take the measure of the Chinese paper
- 1.2.2 Step 2.- Cut the sheets and mark where they will be joined
- 1.2.3 Step 3.- Paste the paper by its ends
- 1.2.4 Step 4.- Make a circle of wire for the base
- 1.2.5 Step 5.- Make the cross that will hold the wick of the balloon
- 1.2.6 Step 6.- Make the wick of the balloon
- 1.2.7 Step 7.- Wrap the wick of the balloon in the base
- 1.2.8 Step 8.- Write your wish and tie it to the balloon
- 2 How to Make an 8 Sheet Cantoya Balloon?
- 2.1 Materials to use;
- 2.2 Step 1.- Cut the tissue paper in half
- 2.3 Step 2.- Cut the sheets diagonally
- 2.4 Step 3.- Make rectangles with the triangular papers
- 2.5 Step 4.- Make larger rectangles from the small ones
- 2.6 Step 5.- Join the triangles and rectangles of paper
- 2.7 Step 6.- Place the pieces one on top of the other to glue them
- 2.8 Step 7.- Add glue to the edge and join the pieces
- 2.9 Step 8.- Close the balloon by gluing the last edge
- 2.10 Step 9.- Cut the napkin to make the wick
- 2.11 Step 10.- Submerge the napkins in the liquid wax
- 2.12 Step 11.- Make the base of the balloon
- 2.13 Step 12.- Place the base on the edge of the balloon and fix it
- 2.14 Step 13.- Make a base for the balloon wick
- 2.15 Step 14.- Bring the wick to the center and turn the base into a kind of spider
- 2.16 Step 15.- Wind this spider with wick to the base of the balloon
- 3 How to Make a Small Cantoya Balloon?
- 3.1 Materials to use;
- 3.2 Step 1.- Cut the paper for the cantoya balloon
- 3.3 Step 2.- Mark the gluing edges on the paper
- 3.4 Step 3.- Glue all the ends very well
- 3.5 Step 4.- Make a base circle for the balloon
- 3.6 Step 5.- Create a base for the wick and attach it to the base of the balloon
- 3.7 Step 6.- Make the wick for the cantoya balloon
- 3.8 Step 7.- Wrap the wick in the base hook
- 3.9 Step 8.- Release the balloon
- 4 How to Make a Cantoya Balloon in the Shape of a Cube?
- 4.1 Materials to use;
- 4.2 Step 1.- Join two Chinese papers by the width
- 4.3 Step 2.- Fold two more papers and place the first ones on top
- 4.4 Step 3.- Put a sheet of Chinese paper under the previous one
- 4.5 Step 4.- Repeat the previous step
- 4.6 Step 5.- Join all the sides of the paper to assemble the cube
- 4.7 Step 6.- Cut one of the corners to place the base of the balloon
- 4.8 Step 7.- Prepare the wick for the cantoya balloon
- 4.9 Step 8.- Assemble the base of the balloon and place the wick
- 4.10 Step 9.- Fix the base to the ridge balloon
- 5 How to Make a Cantoya Balloon in the Shape of a Rhombus?
- 5.1 Materials to use;
- 5.2 Step 1.- Cut the sheets of Chinese paper diagonally
- 5.3 Step 2.- Paste the triangles at the 90º angle
- 5.4 Step 3.- Fix a pair of triangles at the base
- 5.5 Step 4.- Start by gluing the first two rhombuses to close the balloon
- 5.6 Step 5.- Glue the rhombus 2 to the third from the other end
- 5.7 Step 6.- Repeat the two previous steps until finished
- 5.8 Step 7.- Make the wick for the cantoya balloon
- 5.9 Step 8.- Roll up the wick and wait for it to dry
- 5.10 Step 9.- Shape the base structure of the balloon
- 5.11 Step 10.- Calculate the size of the base and take it to the balloon
- 5.12 Step 11.- Cut the opening in the balloon to put the base
- 5.13 Step 12.- Fit the wick at the base of the balloon and voila!
- 6 What is the price of a Cantoya Balloon?
